If you purchase something from one of our links, we make a small commission. So in essence, you may have just got me a cup of coffee! Thank you! This will in no way have an impact on the price of the item...
Have you ever wondered if there’s a secret to brewing the perfect cup of coffee at home? Guess what? It starts with roasting your own coffee beans. And I’m going to walk you through every step of the way. This isn’t just about transforming green coffee into something exquisite; it’s also about the satisfaction of crafting something uniquely yours.
Roasting coffee at home may sound daunting, but it’s an adventure that brings you closer to your coffee than ever before. It’s a pursuit that rewards you with exceptionally fresh flavors while giving you control over the roast profile. Don’t worry too much about perfection on your first try; even the simplest methods yield satisfying results.
Now, roasting times will usually vary between 10-16 minutes, influenced by factors like the roasting method you choose and the size of your bean batch. You’re going to discover that the journey to securing that divine cup of coffee passes through a landscape of popping sounds, color changes, and enticing aromas – all signs of coffee beans transforming into the perfect roast.
Ready to embrace the role of artisan coffee roaster? I’m here to help you with that. Our next step beckons as we explore how to select a coffee roaster that suits your personal needs and preferences. Whether it’s a simple skillet or a high-tech roasting appliance, the choice is yours to make. So, let’s get started!
Selecting Your Home Coffee Roaster
So you’re ready to take a plunge into the world of home coffee roasting. The first step is choosing the right roaster, and trust me, there’s quite a bit to consider. You can keep it simple and budget-friendly or go for more specialized equipment. I’m going to help you sift through the options.
Let’s start with DIY methods because they’re straightforward and affordable. An electric popcorn popper is a popular choice, and for a good reason. It’s designed to circulate hot air, which evenly roasts the beans, and it doesn’t break the bank. Just make sure it’s the type that lets you control the temperature, not all do.
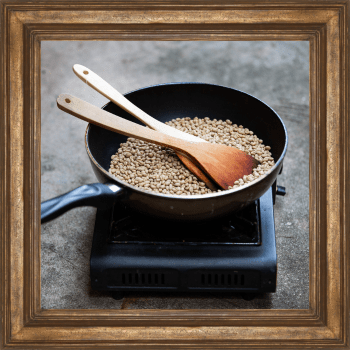
If you’re the hands-on type, roasting coffee beans in a skillet or your kitchen oven could be right up your alley. This method requires constant attention and stirring to avoid uneven roasts, but it’s a great way to start without any additional equipment costs.
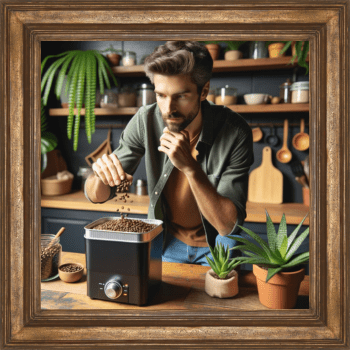
Now, if you’re going for precision and a bit more control, home coffee roasting appliances might suit you better. They come with bells and whistles like chaff collectors, smoke reduction systems, timers, and precise temperature controls. While these devices cost more, they make roasting beans less of a chore and more of a controlled science.
Deciding on the right roaster isn’t just about the price tag; it also depends on how much coffee you want to roast at a time, whether you care for automation, and how much space you have. If it’s just you and maybe another coffee enthusiast at home, small batch sizes and simple equipment might be all you need. On the flip side, if you entertain often or love having fresh beans on-hand, look into a larger, more automated roaster.
In the end, whether you opt for a popcorn popper or a state-of-the-art roasting appliance, remember the journey is about mastering the roast and savoring the beans you craft. Go for the method that aligns with your lifestyle and how engaged you want to be in the process.
Choosing the Right Green Coffee Beans
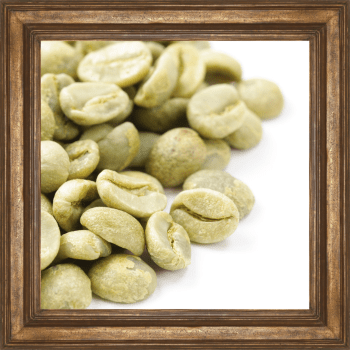
The heart of roasting your own coffee at home lies in selecting the right green coffee beans. It’s this raw material that sets the foundation for the flavor nuances and overall quality you’ll achieve. Just like any recipe, it starts with the right ingredients.
When hunting for green coffee beans, you’re going to come across a plethora of options. You’ll find beans from all corners of the globe, boasting profiles that range from bright and fruity to deep and chocolatey. The origin of the bean – whether it’s from the hills of Colombia or the mountains of Ethiopia – dramatically influences the taste.
Beyond origin, you’re going to find out about varietals, which are the subspecies of the coffee plant. Much like wine grapes, each varietal comes with its own set of flavor characteristics. Also, pay attention to the processing method – whether the beans are washed, natural, or monsoon – each technique imparts different flavor notes to the final product.
While selecting beans, you should also consider the altitude at which they were grown. Higher altitudes typically result in denser beans, which often equate to more complex acidity and vibrant flavors once roasted. So choose something that resonates with your personal flavor preference or gets adventurous and experiment with a variety!
Remember that a successful roast starts with quality beans. Ensure your supplier is reputable and provides information on the bean’s harvest date. Freshness is key since older beans can result in a less lively cup, regardless of your roasting prowess.
Understanding the Roasting Spectrum
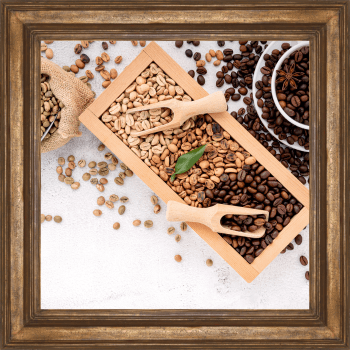
Getting up close with the roasting spectrum is where the real magic happens in coffee. This isn’t just about turning your beans brown; it’s about unlocking the flavors within. And let me tell you, a solid grasp on the roast stages is like having a behind-the-curtain pass to a top-notch coffee house.
Each stage is a new act in the play of coffee roasting, marked by distinct temperature milestones. To start, we have the drying phase, where you’re essentially coaxing the moisture out of the beans. They’ll go from green to yellow, signaling that the roast is underway.
Next up is the first crack, a critical juncture in the roasting process. It literally sounds like popcorn popping. This stage ushers in a lighter roast packed with complex flavors. Now, if you push beyond the first crack, you’ll enter the realm of caramelization, where sugars start to brown and oils emerge, developing a bolder profile.
Now, about darker roasts: these begin as you approach the second crack. The beans darken, and flavors become more pronounced and toasty. Popular dark roasts include Espresso and French. However, be wary of going too far.
Your goal is to capture the roast at its peak according to your taste. Fancy a bright, acidic coffee? Aim to cool the beans shortly after the first crack. Or, if a full-bodied, chocolaty brew is more your bag, nudge closer to the second crack, but remember – timing and temperature are everything.
This careful dance of heat and timing ensures that the innate character of your beans shines through in every cup. The next step is to follow some simple and effective steps to make sure your next roast goes off without a hitch.
Roasting Your Coffee Beans: Practical Steps
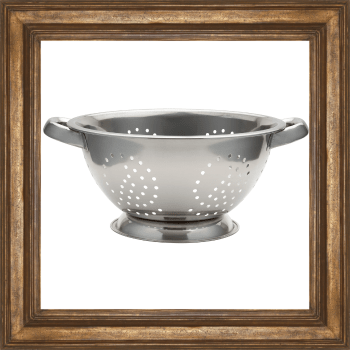
Setting up for a seamless home roasting experience starts with a bit of preparation. First, gather all the necessary equipment. Depending on the method you’ve chosen, this might include your chosen roaster, a metal colander, oven mitts, a wooden spoon if using a skillet, and a timer. Safety is paramount, so ensure you’re roasting in a well-ventilated area to handle the smoke that will inevitably be part of the process.
Now, let’s get into the actual roasting. Begin by preheating your roaster. If you’re using a popcorn popper or oven, aim for a consistent temperature before adding the beans. For skillet users, a medium heat setting will do the trick. Once you’ve added the beans, start your timer. The next 10 to 16 minutes will be a period of careful attention and adjustment.
You’ll notice several changes in the beans as they roast. They’ll go from green to yellow, then to varying shades of brown. You’re going to find out about the ‘first crack,’ which is a pivotal moment in roasting. This sounds like popcorn popping and signals a light roast. If you’re craving a darker roast, keep the beans roasting until you reach the ‘second crack’ stage, but be vigilant – a minute too long, and you might end up with those dreaded burned beans.
Throughout this process, stay engaged. Stir the beans frequently if using a skillet and check the color regularly. Adjusting the heat might be necessary as the beans release moisture and oils. The transformations happening inside the beans are complex, but I’m here to help you learn through experience.
Once you’ve achieved the desired roast level, it’s crucial to cool the beans quickly to stop the roasting process. Transfer them to a metal colander and shake or stir them to dissipate the heat. Remember, the beans will continue to ‘develop’ for a short while, so factor this into your roasting duration.
In the next section, we’re going to tackle what you do once your beans are roasted to perfection. This includes cooling them down rapidly, getting rid of the chaff – a layer of skin that comes off the beans during roasting – and the various ways you can store the beans to maximize freshness. After all, the end goal is always a superior cup of coffee that suites your individual taste.
Post-Roast: Cooling, Storage, and Enjoying Your Coffee
Congratulations, you’ve just roasted your own coffee beans at home, and you’re on the cusp of savoring a truly personal cup of coffee. But before you brew, let’s talk about cooling and storage, because they’re just as crucial as the roasting process itself. After all, your efforts should culminate in the freshest, most flavorful coffee possible.
Once the roast is complete, you’ll want to cool the beans quickly to stop the cooking process. Spread them out on a baking sheet or use a colander to agitate them—cool air will do the trick. Some roasters have built-in cooling functions, but if you’ve gone the DIY route, you may need to get a bit inventive.
Removing the chaff, the flaky skin that comes off the beans during roasting, is the next step. A gentle shake or a breeze can help separate the chaff from the beans. Some home roasters come with a chaff collection feature, which can be a real time saver.
Storage is key. You’ll want to keep your freshly roasted beans in a cool, dark place, away from direct sunlight and moisture. Use an airtight container; some folks swear by sealing them with a one-way valve to allow gases to escape. Just don’t jump the gun—give your beans a day or two to degas before brewing.
And now, the moment you’ve been waiting for: brewing your coffee. Use your preferred method, whether it’s a French press, pour-over, or espresso. The right grind and water temperature will make all the difference, so pay attention to those details.
Remember, the journey to fantastic home-roasted coffee doesn’t end with the roast. It’s the care and attention you give every step of the way that elevates your coffee from good to extraordinary. So take your time, experiment with roasts and brewing methods, and find what delights your palate. Enjoy the fruits of your labor, and let every sip remind you of the unique experience that is home coffee roasting.

Brandyn hails from Minnesota. His passions include, drawing portraits, Researching, Writing, and of course, COFFEE!!! When he’s not drinking coffee, he’s learning how to make his next cup even better. He writes down everything he learns and shares them on his website “ReigningCoffee.com”. If he’s not writing or researching, he’s probably drawing. His goal is to help you enjoy your coffee, even more than you already do.