
If you purchase something from one of our links, we make a small commission. So in essence, you may have just got me a cup of coffee! Thank you! This will in no way have an impact on the price of the item...
Imagine sipping on a smooth, chilled coffee on a warm day – that’s the essence of cold brew, a method where time takes precedence over heat. But this isn’t simply iced coffee; it’s coffee steeped in cool water, usually overnight, resulting in a taste that’s both bold and forgiving on the palate.
The tale of cold brew winds back to Japanese traders who learned about it from the Dutch, and its appeal has spread across the globe. Today, you’re likely to spot cold brew options in cafes everywhere, with many coffee enthusiasts making it a part of their daily ritual.
One of the key reasons for the method’s success is its brewing process, which tends to extract fewer acids from the coffee. This means a smoother cup with less bitterness and acidity than hot-brewed methods often produce. Moreover, it’s a forgiving brew, less prone to the fluctuations of temperature and time. It’s no wonder that making cold brew coffee at home has become an increasingly favored pastime.
Transitioning smoothly into the next section, I’m here to help you get to grips with what goes on in your jug or jar as it sits quietly on the counter or in your fridge. Understanding the process is crucial for pulling off the perfect homemade cold brew, which is exactly where we’re headed next.
Cold Brew Basics: Understanding the Process
The process of making cold brew isn’t just about soaking coffee grounds in water. It’s a carefully honed practice that yields a smooth, robust cup that’s less acidic and gentler on the stomach than its hot-brewed counterpart. Let’s explore why.
In the realm of coffee, extraction is the game, and cold brew plays by its own rules. Unlike hot coffee, which relies on heat to extract flavor rapidly, cold brew takes a slow dance with time and temperature. The extended extraction time, usually ranging from 12 to 24 hours, allows the water to gently coax out the coffee’s flavors. This not only reduces the bitterness often associated with heat but also highlights the subtle nuances of your chosen beans.
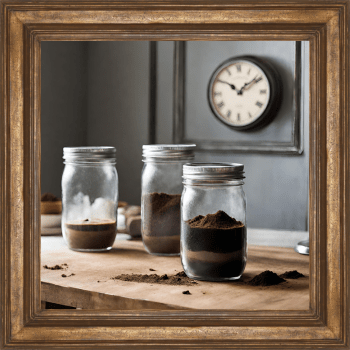
You’re going to find out about trusty tools for this brewing method, which thankfully aren’t complicated. A jar or a pitcher, a strainer, and maybe a dedicated cold brew coffee maker, if you want to get fancy—that’s pretty much your list. But here’s something fascinating: the simplicity of the equipment underscores the importance of the variables you can control, such as coffee-to-water ratio and steeping time.
Now what might seem like magic coming out of your fridge after a night is actually chemistry at play. Let’s not forget water quality. It’s a silent player, but don’t underestimate its role. Great-tasting water equals great-tasting coffee. Part of crafting the perfect cold brew is ensuring you start with a water that you enjoy drinking straight.
But hey, if you think this process is exclusively for the caffeine connoisseur, think again. Anyone can master the art of cold brew with a bit of patience and attention to detail. And with this skill under your belt, you can look forward to a truly customized coffee experience at home.
Choosing Your Beans and Grind
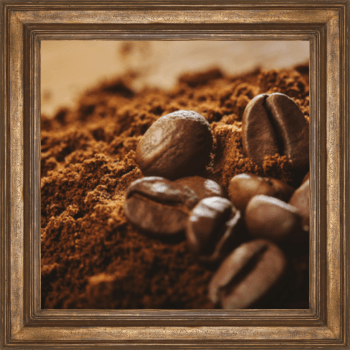
The type of coffee bean you select is going to make a significant impact on your final cold brew. Now, let’s talk about the types of beans that work best for cold brew. You might want to consider beans with a chocolatey, nutty profile. These often lead to a richer, smoother cold brew. Single-origin beans from regions like Brazil or Ethiopia come highly recommended by experts for their consistent quality and distinctive flavors.
Grind size is crucial in cold brewing. A coarse grind is your best bet. Why? Because a coarse grind allows for a slow and even extraction of flavor, which is vital since cold brew demands a longer steeping time than hot coffee methods. A fine grind can lead to over-extraction and bitterness, something we definitely want to avoid.
When shopping for coffee, you can always ask your local roaster for a ‘cold brew blend’ or beans that are known to perform well when cold brewed. Your choice doesn’t need to be expensive, but it should resonate with your taste preferences. And remember, fresh is best when it comes to coffee beans, so look for beans that have been roasted within the past two weeks for optimal flavor.
If you’re curious about how different origins and roasts can alter the taste of your cold brew, why not experiment? Try a light roast for a brighter, more acidic brew, or go with a dark roast for something bold and robust. However, I have to say, medium roasts often strike a happy balance, giving you the best of both worlds in terms of flavor and body.
Alright, now that you’ve got your coffee ammo ready, it’s time we move on to the actual brewing process. I’m going to take you through a beginner-friendly recipe in the next section. You’ll find out how to combine the right grind with the perfect technique to create a cold brew that’s not just good—it’s great.
Step-by-Step Cold Brew Recipe for Beginners

Now, I’m going to walk you through the actual cold brew making process. It’s straightforward and doesn’t require a Ph.D. in brewing; promise. Let’s aim for a recipe that serves up a smooth, rich flavor that’s perfect for a hot day or a leisurely weekend morning.
First off, you’ll need about one cup of coarsely ground coffee. Remember, the coarse grind helps to ensure that your brew isn’t bitter. Combine this with about four to five cups of cold or room temperature water. The golden ratio for a balanced cold brew is often cited as 1:4 coffee to water, but you’re going to find out about adjusting this ratio later.
Mix the grounds and water in a large jar or pitcher. If you’re going for immersion, make sure everything is wet. You don’t want any dry patches in there. Once it’s all mixed up, cover it and let it sit at room temperature. The magic number? 12 to 24 hours. Yes, it’s a patience game, but it pays off.
When time’s up, it’s all about the filter. You can use a fine-mesh sieve lined with a coffee filter or a cheese cloth. Slowly pour the mixture through, ensuring that the grounds are separated from your brew. Depending on your equipment, you might have to do this a couple of times to get a clear liquid.
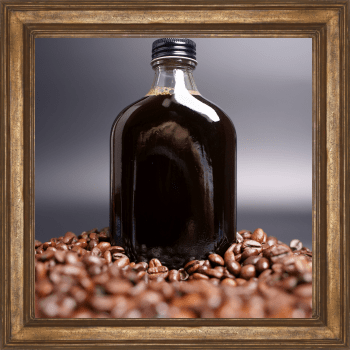
Now, your cold brew concentrate is ready. This isn’t just about drinking it as is; it’s also about understanding that it’s a concentrate. You’ll likely want to dilute it with water, milk, or a milk alternative. The standard dilution is 1:1, but again, choose something that resonates with you.
Alright, does that sound easy enough? Super. In the next section, I’ll help you with customizing your batch. Whether you want a chocolatey undertone or a hint of vanilla, a bold kick or mellow sip, there’s a lot you can do to make your cold brew uniquely yours.
Customizing Your Cold Brew: Flavors and Strength

Now that you’ve got the basics down, it’s time to tailor your cold brew to match your personal taste. I’m going to walk you through the ways to fine-tune the strength and flavor of your homemade cold brew, ensuring each sip is just the way you like it.
First off, strength. Don’t worry too much about getting this perfect on the first try. Your cold brew’s strength will largely depend on your brewing time. A standard range is 12 to 24 hours, but you can always adjust this according to your preference. The longer you brew, the stronger and more intense the flavor will be. Start with 16 hours and tweak from there.
Flavor infusions can make your cold brew uniquely yours. From vanilla pods to cinnamon sticks, infusing these during the brewing phase imparts subtle flavors. Don’t hesitate to experiment with different additives, like orange peels or cardamom pods, just remember to add them in moderation.
Finally, when serving your cold brew, consider what you’re adding to it. If you prefer your coffee black, you’re all set. But if you like a bit smoother taste, choose something that suites your palate, like almond milk or sweetened condensed milk. Add-ins like syrups can elevate the flavor profile even further. Think homemade caramel or a hint of mint for a refreshing twist.
Choose your adventure with these customization options, and remember, you can always adjust your approach down the road. Now, let’s talk about keeping that delicious cold brew at its best. This is going to include tips for preserving your coffee in the next section.
Preserving Your Cold Brew: Tips and Tricks
Now that you’ve mastered the art of making your own cold brew at home, let’s talk about keeping it fresh and flavorful. I’m going to share how you can maintain that rich taste for as long as possible.
First off, you’ll want to store your cold brew in the refrigerator right after brewing. This slows down oxidation and helps retain the smooth, robust flavor. The key is an airtight container – think mason jars, growlers, or even specialized cold brew coffee containers.
If you’re wondering how long cold brew lasts, the golden rule is up to two weeks in the fridge. However, for the best taste experience, I recommend drinking it within the first week. You’ll notice the flavor may start to change after that; it won’t go bad immediately, but it won’t be peak cold brew territory.
Perhaps you’ve made a little too much? No problem. Cold brew coffee is incredibly versatile. Use it as a base for shakes or baked goods, or freeze it into coffee ice cubes for a zero-waste approach and a punchy addition to future cold brews.
And for those with a creative streak, why not turn your cold brew into coffee-infused syrups or liqueurs? The opportunities to repurpose your cold brew are endless.
I’ll leave you here, hoping I’ve helped you not just to make a cracking cup of cold brew, but also to keep it at its best. Remember, cold brew coffee is more than just a drink – it’s a craft, and part of that craft is taking good care of it. Enjoy your brewing adventure, and feel free to share your thoughts and experiences below!

Brandyn hails from Minnesota. His passions include, drawing portraits, Researching, Writing, and of course, COFFEE!!! When he’s not drinking coffee, he’s learning how to make his next cup even better. He writes down everything he learns and shares them on his website “ReigningCoffee.com”. If he’s not writing or researching, he’s probably drawing. His goal is to help you enjoy your coffee, even more than you already do.