If you purchase something from one of our links, we make a small commission. So in essence, you may have just got me a cup of coffee! Thank you! This will in no way have an impact on the price of the item...
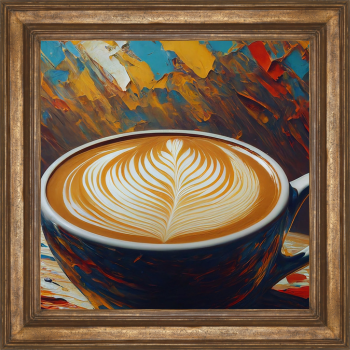
Imagine lifting your morning coffee cup and being greeted with a beautifully crafted heart or a delicate floral design. This isn’t just about starting your day with a caffeine kick; it’s also about adding a touch of artistry to your routine. Welcome to the world of latte art, where your brew becomes a canvas for creativity using nothing but microfoam.
Latte art involves meticulously pouring steamed milk into espresso, resulting in a visually stunning creation that sits perfectly on the surface of your latte. It’s not a modern gimmick – this culinary art form has become a cornerstone for baristas worldwide and is even celebrated in competitions. But here’s a secret: you don’t have to be a professional to make your lattes extraordinary. I’m here to guide you through crafting your own latte art right in the comfort of your home.
Now, don’t worry too much if your first few attempts don’t land you any art awards – latte art is as much about technique as it is about practice. You’ll learn the essential components, from the importance of the perfect espresso pull to achieving silky microfoam. And yes, these can make a world of difference in your quest for that perfect milk-based masterpiece.
With the right tools and some insider knowledge, you’re going to find out how attainable and fulfilling making latte art can be. By the end of this section, you’ll not only grasp the basics but also the subtle nuances that can elevate your latte from simple to sensational.
So what’s the game plan? We’ll start by getting familiar with the tools of the trade and understanding what goes into making that perfect foam for our lattes. Stay tuned, as the next section will reveal a handy tutorial tailored for beginners, illustrating the journey from choosing the right equipment to pouring your first design. Embrace the process, choose something that resonates with you, and let’s embark on this aesthetically pleasing adventure together.
Latte Art Tutorial for Home Baristas

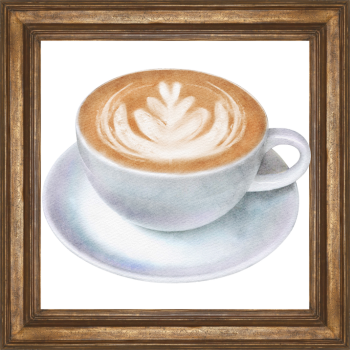
Welcome to the exciting world of latte art, right from your own kitchen. Making latte art at home isn’t reserved for the professional baristas; with a bit of guidance and practice, you too can start creating eye-catching designs that make each cup of coffee special.
Now, if you’ve got an espresso machine with a steamer — fantastic. That’s your golden ticket to latte art. We’re not just making coffee; we’re adding a splash of creativity to your morning routine. Remember, the secret to impeccable latte art lies in the milk. Good latte art uses microfoam — this is milk steamed to create tiny, consistent bubbles with a glossy, smooth texture akin to wet paint. Getting the steamed milk right is critical, no matter if you’re aiming for simple designs or more complex patterns.
For beginners, I’m going to walk you through the fundamental steps. These steps will set the foundation from which you can start experimenting and refining your own latte art skills. This includes the basics: preparing your espresso, steaming the milk to achieve that silky microfoam, and the method of pouring it all together to form your first work of art.
Just don’t worry too much about getting everything perfect on the first try. Latte art is as much about of the process as it is about the end result. Your first attempts will be learning experiences, so embrace the spills and less-than-perfect hearts or leaves. You can always adjust your approach down the road.
Mastering the Craft: Key Steps in Latte Art Creation
You’re ready to roll up your sleeves and get to the heart of latte art. Making latte art at home is as much about precision as it is about creativity. I’m going to walk you through some indispensable steps that are going to take your cup of joe from ordinary to ‘Is that really homemade?’
Let’s kick things off with the non-negotiables: your gear. A reliable espresso machine with a steaming wand, a quality grinder for fresh espresso (because fresh is best), and a metal pitcher with a temperature sticker are your basic artillery. Choosing the right size of the mug—around 6 ounces—is also crucial because the proportion of espresso to milk needs to be on point for the art to take shape.
Now, let’s talk milk. Whole milk is generally recommended because its fat content creates the creamiest microfoam. However, if you’ve got dietary preferences or restrictions, don’t let this deter you. Alternative milks like almond or soy can also do the trick, though they might require a few more practice runs to achieve the right texture.
Making microfoam is where the magic happens. This is the stuff that will serve as your canvas. Microfoam with tiny, uniform bubbles, akin to wet paint in its consistency, is what you’re aiming for. I’m going to let you in on a little secret: the colder the milk, the more control you have over the foaming process. Start with milk straight from the fridge, and aim for a final temperature between 140-160 degrees Fahrenheit—hot without scalding, because you want to keep those bubbles intact.
The moment of truth approaches as you combine your espresso with your frothed milk to create beautiful latte art designs. Starting with the basics, you can craft a simple heart or a tulip. Remember, it’s not just about dumping milk into coffee. It’s a delicate dance between the milk jug and the cup—tilting, pouring, and then the final flourish that gives your latte those Instagram-worthy looks.
Beyond the Basics: Advanced Tips for Latte Art Perfection
I’m here to help you elevate your latte art from simple designs to show-stopping creations. But remember, patience is key.
If you’re finding that your latte art isn’t quite looking as you envisioned, you’re not alone. Pouring milk too slowly or lifting the pitcher too high can turn your tulip into a blob. Don’t worry too much about it, everyone starts somewhere.
To get the perfect microfoam, ensure your espresso shots are top-notch first. That’s the bedrock of good latte art. Then, focus on the milk’s temperature and texture. It should feel like wet paint, not too thick or thin.
In my opinion, pouring technique is an art form in itself. A steady hand and a methodical pour will give rise to hearts, rosettas, and more. Start with the pitcher close to the cup and gradually elevate it as you create your design.
Etching takes your latte art into another dimension. A toothpick or a thin steaming wand can be used to draw delicate lines through your foam. When you’re feeling bold, try using chocolate syrup for a sweet twist.
You can always adjust your approach down the road, but start with these tips, and you’ll see improved results.
Latte Artistry: Encouraging Exploration and Expression

If you’ve made it this far in your latte art adventure, I want you to give yourself a pat on the back. It’s not every day that someone decides to take their coffee game to this level of creativity and skill. Remember, mastering latte art is a journey—there are going to be spills, misshapen designs, and quite a few ‘abstract’ pieces along the way. But that’s all part of the discovery process.
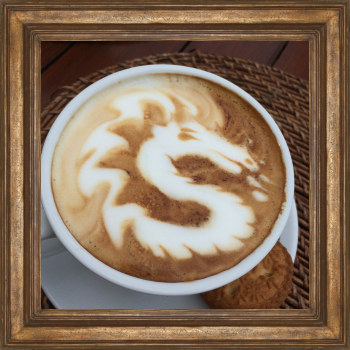
Don’t hesitate to branch out and experiment with your techniques. Sure, you’ve got down the basics of tulips and hearts, but why not try a swan or even a dragon? Sounds ambitious, right? Well, it is, but the satisfaction of nailing that daunting design is worth every attempt. And who knows, you may just innovate the next big trend in latte art while you’re at it.
In my opinion, the real beauty of latte art isn’t in the perfection of the end product—it’s in the expression of the person crafting it. Whether you’re doing this to impress your morning guests, perk up your social media feed, or simply because you love the therapeutic act of pouring, the most important aspect is that it brings you joy.
Lastly, I’m here to tell you that your efforts and dedication to creating these small, yet significant, works of art in a cup are what coffee culture is all about. So keep pouring, keep practicing, and let your latte be the canvas for your daily dose of creativity. Today’s slightly shaky leaf could well be the precursor to next week’s perfect rosetta. Embrace the unexpected, and above all, have fun with it.

Brandyn hails from Minnesota. His passions include, drawing portraits, Researching, Writing, and of course, COFFEE!!! When he’s not drinking coffee, he’s learning how to make his next cup even better. He writes down everything he learns and shares them on his website “ReigningCoffee.com”. If he’s not writing or researching, he’s probably drawing. His goal is to help you enjoy your coffee, even more than you already do.